
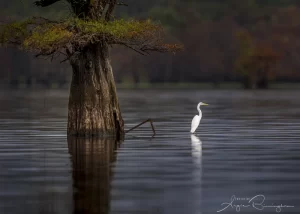
 The wildlife will not wait while you hunt through menus. The light on Caddo Lake will not hold still while you wonder which autofocus mode you chose last week. A useful nature photography field guide is not about memorizing every button on your camera. It is about building a few dependable habits so you can respond when the outdoor world gives you a moment worth keeping.
Whether you are photographing backyard cardinals, a Texas wildflower patch, a Yellowstone bison, or a big Alaska sky, the goal is the same: arrive prepared, work thoughtfully, and allow yourself enough room to pay attention. Great nature photographs often come from people who noticed what was happening before it happened.
Start With the Subject, Not the Settings
Before touching the camera, spend a minute watching. Where is the animal moving? Is the bird returning to the same perch? Is the wind bending the grass in one direction? Is the sun creating a clean background or putting a bright stripe right through your subject’s head?
This little pause changes everything. A camera can make technical decisions, but it cannot choose the strongest place to stand. If a bird is landing on a familiar branch, get positioned before it returns. If a deer is walking along a treeline, look for an opening that gives you a clean view rather than shooting through every twig in the county.
For landscapes, ask what drew you in. It may be leading lines in a trail, reflected color on quiet water, or one lone cypress tree in morning fog. Put that element to work in the frame instead of trying to include every interesting thing you can see. More scenery does not always make a stronger photograph.
A Nature Photography Field Guide to Camera Settings
You do not need a complicated formula for every scene. You do need a starting point that makes sense for the kind of motion and depth you are photographing.
For birds and active wildlife, shutter speed is usually the first priority. A perched bird may work at 1/1000 second, while birds in flight often need 1/2000 second or faster. Fast wingbeats, running mammals, and playful behavior may call for even more speed. These numbers are starting points, not laws. A large, slow-flying pelican is different from a tiny, darting swallow.
For landscapes, the question shifts from stopping motion to controlling depth of field. An aperture around f/8 to f/11 is often a comfortable place to begin when you want detail from foreground to distance. If wind is moving flowers or leaves, do not forget that your shutter speed still matters. A beautiful composition with blurry wildflowers can be frustrating when you get home.
Auto ISO is a wonderful field tool when used intentionally. Set the shutter speed and aperture you need, then let ISO adjust for changing light. Keep an eye on it, especially as the day gets darker. A slightly noisy image is usually far better than a blurry one, but there is no prize for accidentally shooting everything at ISO 25,600 when a small adjustment could have helped.
Autofocus deserves attention, too. For moving wildlife, continuous autofocus is typically your friend. Use a subject-detection mode if your camera offers one, but do not assume it is magic. Branches, grass, water reflections, and low contrast can fool even very good systems. When the camera grabs the background, calmly reset, find the eye, and try again. We have all had a camera become deeply interested in a stick.
Light Is the Part You Cannot Buy
The best lens in the world cannot turn harsh, overhead sun into soft golden light. It can still make a fine photo, of course, but you will need to work differently.
Early and late light is kinder to wildlife and landscapes. It brings warmer color, lower contrast, and a better chance of catchlights in an animal’s eyes. It also tends to be when many animals are most active. That is a pretty good reason to set the alarm, even if the hotel coffee has not caught up with you yet.
Midday light is not a wasted day. Look for shade, backlighting, graphic patterns, close-up details, or behavior rather than classic portraits. A dragonfly glowing against bright water, a bison surrounded by blowing snow, or a black-and-white study of a twisted tree can work beautifully when you lean into the conditions instead of fighting them.
Cloudy days are especially helpful for birds, flowers, forests, and intimate landscapes. Soft light reduces contrast and gives you more flexibility with exposure. The trade-off is slower shutter speeds, so be ready to raise ISO for moving subjects.
Compose for the Moment, Then Simplify
When people say a photo feels busy, the issue is often not the subject. It is everything around the subject. Before you press the shutter, look at the edges of the frame. Is there a bright rock, clipped wing, distracting branch, or patch of sky pulling attention away from the main event?
Move your feet when you can. A step to the left may replace a cluttered background with clean water. Kneeling can put you closer to an animal’s eye level and turn an ordinary portrait into a more intimate one. With landscapes, lowering the tripod a few inches can make a foreground shape feel more connected to the rest of the scene.
Give wildlife room to look or move into. If a fox is walking to the right, leave some space on the right side of the frame. If a bird is looking toward an open area, that open space can help tell the story. Centered compositions can be powerful too, especially when symmetry, direct eye contact, or a strong reflection calls for it. The rule of thirds is a useful suggestion, not the sheriff of photography.
Field Habits That Save Good Opportunities
Nature photography has a way of revealing the one item you forgot. A little preparation keeps small problems from becoming a long drive home with a very expensive camera in the passenger seat.
Bring these five basics on every outing:
- Fully charged batteries, plus a spare kept warm in cold weather.
- Empty memory cards or cards with enough space for a busy morning.
- A lens cloth for dust, spray, fingerprints, and that mysterious smudge that appears at the worst time.
- Water, weather layers, and sun protection for you.
- A simple rain cover or dry bag for sudden weather and wet ground.
Also, set your camera up before the action starts. Confirm that your exposure compensation is not still set from yesterday’s snowy scene. Check your focus mode. Take a test frame and look at the histogram if the light is tricky. These are small, unglamorous habits, but they build confidence fast.
A tripod can be a huge help for landscapes, low-light scenes, and deliberate compositions. For wildlife, a monopod or handheld setup may be more practical when subjects move quickly. There is no universal answer. Use the support that helps you react without making you feel tied to the ground.
Photograph Wildlife With Respect
The most meaningful wildlife images come from patient observation, not pressure. Keep a respectful distance, stay quiet, and let the animal behave naturally. If an animal changes direction, stops feeding, gives alarm calls, or keeps watching you instead of going about its business, you are too close.
Never bait, block, chase, crowd, or disturb wildlife for a photo. That includes getting between a mother and young, approaching nests, or pushing an animal toward a road or another photographer. A long lens is often the best piece of wildlife ethics gear you can own because it lets you create a close-looking image without being physically close.
Respect the place as well as the subject. Stay on durable surfaces where required, follow refuge and park rules, and avoid trampling vegetation for a better angle. The photograph matters. The living landscape matters more.
Review With Curiosity, Not Frustration
At the end of an outing, do not just look for your favorite image. Look for patterns. Were your bird images consistently back-focused? Did you clip highlights in bright snow? Did your strongest landscapes happen when you slowed down and worked one scene instead of racing to the next overlook?
This is where real improvement happens. Keep a short note in your phone about what worked, what did not, and one thing to try next time. Maybe it is practicing back-button focus in the yard. Maybe it is learning to read light before sunrise. Maybe it is getting more comfortable with exposure compensation around white birds.
Field learning becomes much easier when someone can look at the situation with you, explain the why, and help you make the adjustment right there. That is the heart of the experience we love creating at Jeff & Angie Photography: time outdoors, cameras in hand, and no pretending you are supposed to know it all already.
The next time you head out, give yourself permission to make fewer photographs with more intention. Watch the light, notice the behavior, choose a clean frame, and be ready when the world does something wonderful. That moment may last half a second, but the satisfaction of being prepared for it can stay with you for years.