RAW vs JPEG for Wildlife Photography: Which Should You Use?
If you’ve ever scrolled thru your camera menu and wondered whether to shoot RAW or JPEG, you’re not alone. It’s one of the questions we hear from photographers who join us on Jeff and Angie Photography workshops and tours, especially those who are beginning to take more control of their cameras and editing.
Both RAW and JPEG can produce beautiful photographs, but they work very differently.
For most of our bird photography, wildlife photography, and nature photography, we recommend shooting in RAW because it gives us more information to work with when we edit. Wildlife does not always cooperate with perfect light, perfect backgrounds, or perfect exposure. Having that additional information can make a big difference when we sit down at the computer after a day in the field.
That does not mean JPEG is wrong.
The best choice depends on how you photograph, how much editing you want to do, and what you plan to do with your images afterward.
Let’s look at RAW vs JPEG for wildlife photography and help you decide which file format makes the most sense for you.
RAW vs JPEG Nature Photography: The Real Difference
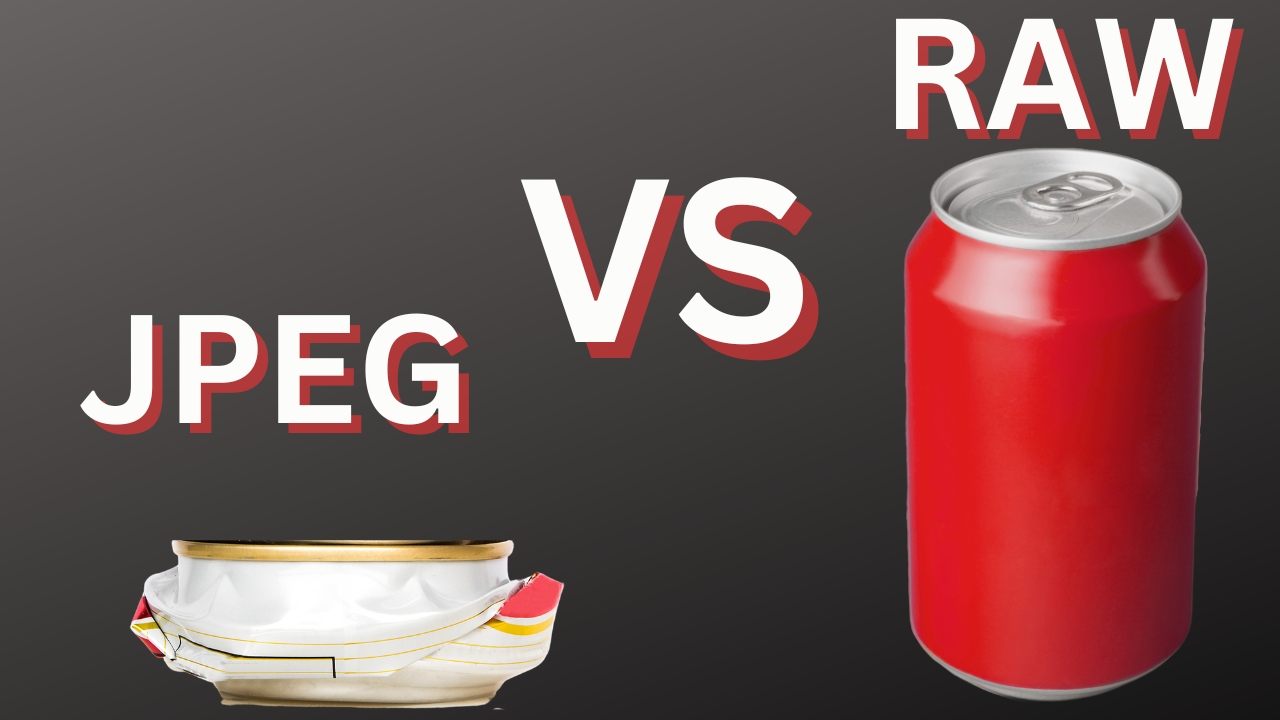
A RAW file is often called a digital negative because it retains the original image data recorded by your camera’s sensor.
That extra information gives you much more flexibility when you begin editing your nature photographs. RAW files generally contain more information in the highlights and shadows, greater dynamic range, and more color information than a compressed JPEG file.
Think of your editing software as your digital darkroom.
Your camera records the information, but you decide later how you want the finished image to look. You can make decisions about brightness, contrast, color, white balance, shadows, highlights, and other adjustments as you process the photograph.
A JPEG works differently.
When your camera creates a JPEG, it processes the image for you. Depending on your camera and settings, it may apply contrast, saturation, sharpening, white balance, and a picture profile before saving the photograph.
JPEG files are also compressed. That makes them smaller, easier to store, and convenient to share, but some of the original information captured by the camera is discarded during that compression.
That is why JPEG photographs often look more colorful, crisp, and finished when you first see them.
A RAW image may initially look flatter or duller.
Don’t panic.
That does not mean the RAW file is worse. It simply means the camera has left more of the creative decisions up to you.
Why We Recommend RAW for Wildlife and Bird Photography
When Jeff and I are photographing or teaching in our wildlife photography workshops and nature photography tours, we generally recommend using RAW.
Why?
Because nature does not give us nice, controlled studio lighting.
You might have a white egret standing against dark water one minute and a bird tucked into heavy shadows the next. An animal may move from shade into direct sunlight before you even have time to think about changing your exposure.
Birds are particularly challenging because feathers can contain extremely subtle details.
A white bird can lose highlight detail very quickly. A dark bird may have beautiful feather patterns hidden in the shadows. A backlit bird may have bright light around the edges while much of the body remains dark.
This is one reason we like RAW for bird photography.
RAW gives us more information to work with when we fine-tune the photograph later.
But there is something very important we teach during our bird and wildlife photography workshops:
RAW is not an excuse for bad exposure.
You should still work to get the photograph as close as possible in the camera.
Watch your highlights.
Watch your shadows.
Choose an appropriate shutter speed for your subject.
Select the aperture that gives you the creative look and depth of field you want.
Then use ISO to fine-tune your brightness.
RAW gives a well-captured photograph more flexibility in the digital darkroom. It should not become a reason to stop paying attention while you are behind the camera.
RAW Gives You More Control Over White Balance
White balance is another big reason we recommend RAW for nature and wildlife photography.
Natural light constantly changes.
You may photograph a bird in cool morning shade and then turn around to photograph another subject in warm golden light. Clouds move in. The sun comes out. Your subject moves underneath a tree.
All of those situations can affect the color in your photograph.
RAW files contain more color information than JPEG files, which gives you greater control over white balance when you begin editing.
If an image looks too blue, too warm, or simply different from what you remember seeing, RAW gives you more flexibility to make those corrections.
With JPEG, more of those decisions have already been made by the camera.
RAW Can Make You a Better Photographer
There is another benefit to RAW that we think is especially valuable for photographers who are still learning exposure.
Editing becomes part of the learning process.
When we work with photographers during our Jeff and Angie Photography workshops and tours, reviewing photographs can reveal a lot about what happened in the field.
Maybe you consistently underexpose birds flying against a bright sky.
Perhaps you are losing detail in white feathers.
Maybe your shutter speed was just a little too slow for the action.
Or perhaps the exposure was technically correct, but it wasn’t the creative look you were trying to achieve.
When you compare the original RAW photograph with your finished edit, you begin to understand what your camera recorded and what you might do differently next time.
Editing should not simply be about rescuing photographs.
It should help you become better behind the camera.
RAW Preserves the Subtle Details We Love in Nature
Nature photography is filled with small details.
It might be the texture of feathers on a shorebird, layers of color in a sunrise, shadow detail in an animal’s fur, or subtle greens in a forest.
Those are often the things that make a nature photograph feel alive.
RAW gives you more information to work with when bringing those details into the final image.
The goal is not to push every editing slider as far as it will go.
Our goal is to process an image in a way that supports what we experienced in the field and the story we are trying to tell.
Photography is still an art.
RAW simply gives us a larger digital negative from which to create that final photograph.
The Cost of Shooting RAW
All that extra information comes with a price.
RAW files take up more space.
If you photograph fast-moving wildlife or shoot long bursts of birds in flight, you can create an enormous number of files very quickly.
That means you will need:
- Larger or additional memory cards
- More hard-drive space
- A good backup system
- RAW-compatible editing software
- Time to cull and process your photographs
You may also find that when a new camera is released, your favorite editing program takes a little time to recognize its RAW files. The software supplied by your camera manufacturer will generally support the files from that camera.
For Jeff and me, the additional storage and editing time are worth having the RAW file.
But that doesn’t mean everyone needs to make the same choice.
When JPEG Makes Perfect Sense Outdoors
JPEG can be an excellent choice when speed and simplicity are more important than having maximum editing flexibility.
Maybe you are photographing a family hike.
Perhaps you are documenting a birding trip and want to send pictures to friends immediately.
Or maybe you simply don’t enjoy spending a lot of time editing photographs.
JPEG files are smaller, easy to share, and already processed by your camera.
If you understand exposure, choose your settings carefully, and like the color your camera produces, you can create wonderful JPEG photographs.
There are plenty of photographers who do exactly that.
If you choose JPEG for your nature photography, we recommend selecting the highest-quality JPEG setting your camera offers.
And because you have less editing latitude afterward, pay even closer attention to your exposure while you are photographing.
Use Your Histogram—But Remember Who Is in Charge
Whether you photograph in RAW or JPEG, learn how to use your histogram.
Your histogram shows the brightness information in your photograph. The darker values are toward the left, while brighter values and highlights are toward the right.
But we teach photographers to think of the histogram as a reference—not a rule.
Some photographs should be dark.
Others should be bright.
There is no rule saying every histogram needs to form a perfect hill in the center.
Use it to help identify whether you are losing important information in your shadows or highlights, and then decide what exposure creates the image you want.
Your camera provides information.
You make the creative decision.
Should You Shoot RAW + JPEG?
There is another option.
Many cameras allow you to photograph in RAW + JPEG, which creates both files every time you press the shutter.
For someone learning photography or just beginning to edit RAW images, this can be a great way to start.
You immediately have a JPEG that is processed and ready to share, plus the RAW file if you want to spend more time developing the photograph later.
RAW + JPEG can also be useful during a special wildlife photography tour when you want to share a few pictures during the trip but still want the RAW files available for your best photographs when you return home.
The downside is storage.
You are saving two files for every photograph, so memory cards and hard drives fill up much faster.
This becomes especially noticeable when photographing birds in flight and shooting long bursts of action.
Try RAW + JPEG for several outings and then look at what you actually use.
If you never touch the JPEG files, you probably don’t need to continue saving them.
If the RAW files are piling up on your computer and you never edit them, JPEG might actually fit your photography better.
What We Recommend During Jeff and Angie Photography Workshops and Tours
For most photographers joining us for Jeff and Angie Photography workshops and tours, we recommend photographing in RAW—particularly when the goal is bird, wildlife, or landscape photography.
We want you to capture as much information as possible when that special moment happens.
Wildlife encounters may last only seconds.
Great light may disappear just as quickly.
We would rather have the additional information contained in the RAW file when we get back to the computer.
But our bigger goal is teaching you to get the photograph right in the field first.
During our photography workshops and tours, we work on understanding exposure, shutter speed, aperture, ISO, natural light, composition, backgrounds, and subject behavior—not simply relying on editing software afterward.
The better your original photograph is, the better your finished photograph can become.
A Practical RAW Setup for Your Next Nature Photography Outing
If you are ready to experiment with RAW photography, keep it simple.
Set your camera to RAW or RAW + JPEG and go photograph something you enjoy.
Don’t come home and try to edit 500 photographs.
Choose five.
Work through those five carefully.
Start with adjustments such as
Exposure: Is the overall photograph too bright or too dark?
White balance: Does the color look like the light you remember?
Highlights: Are there bright areas where you want to recover detail?
Shadows: Is important detail hiding in darker parts of the photograph?
Crop and composition: Is there anything around the edges distracting from your subject?
Then move into the more creative parts of the edit.
You will learn far more by carefully processing five photographs and understanding what each adjustment does than by dropping the same preset onto hundreds of images.
RAW vs JPEG for Wildlife Photography: Which Is Better?
So which one wins the RAW vs JPEG debate for wildlife photography?
For Jeff and me, RAW is usually the winner.
It gives us more information, more control over white balance, greater editing flexibility, and more opportunity to preserve the subtle details we work so hard to capture in birds, wildlife, and landscapes.
But JPEG absolutely has its place.
If you prefer smaller files, minimal editing, and photographs that are ready to share directly from your camera, there is nothing wrong with choosing JPEG.
And if you are not sure yet, photograph in RAW + JPEG for a while and decide for yourself.
The most important thing isn’t those letters at the end of your file name.
It is learning to understand your camera, recognize great light, anticipate your subject, capture a proper exposure, and create a photograph that tells a story.
That is what we work on with photographers during our Jeff and Angie Photography wildlife photography workshops, bird photography workshops, and nature photography tours.
Because ultimately, RAW and JPEG are simply tools.
The photographer still creates the image.
Keep on Clickin’!