
Table of Contents
- What You’ll Need Before Switching to Manual Mode
- The Wildlife Photography Exposure Triangle in Practice
- Using Auto ISO in Manual Mode: The Modern Wildlife Workflow
- Shutter Speed for Birds in Flight and Fast Action
- Focusing Techniques for Moving Subjects
- Handling Changing Light and Low-Light Troubleshooting
- Mirrorless vs. DSLR Manual Shooting and Post-Processing
- When to Use Manual Mode vs. Aperture Priority
- Frequently Asked Questions
Last Updated: September 20, 2026
What You’ll Need Before Switching to Manual Mode
Learning how to photograph wildlife in manual mode starts with basics, not new gear, your current camera almost certainly works.
Here’s what to have ready:
- A camera with a command dial for shutter speed and aperture
- A telephoto lens, ideally 300mm or longer
- A memory card with room for RAW files
- A spare battery, since cold mornings drain them fast
- A monopod or tripod for long lenses
- Patience, plus a willingness to miss a few frames
The Wildlife Photography Exposure Triangle in Practice
The wildlife photography exposure triangle balances aperture, shutter speed, and ISO: change one and the others shift to keep the photo bright. Most guides use a still life, but wildlife won’t hold still, so the triangle becomes a set of trade-offs made in seconds.
Aperture: Depth of Field and Subject Isolation
Aperture controls how much of the frame stays sharp, measured in f-stops. A low f-stop like f/4 gives a shallow depth of field, blurring the background and pulling your subject forward, that blur is bokeh, and a wide-open lens gathers more light, which helps at dawn.
Shutter Speed: Freezing Motion vs. Creative Blur
Shutter speed decides whether motion freezes or smears: fast speeds stop a wing mid-beat, slow speeds turn a flying bird into a soft streak. For most wildlife, start at 1/1000s and adjust, small, quick birds need more, a walking elk less. The catch: a fast shutter lets in less light, so you’ll often raise ISO to compensate.
ISO and Sensor Sensitivity: The Third Variable
ISO sets how sensitive your sensor is to light. Higher ISO brightens a dark scene but adds digital noise.
Using Auto ISO in Manual Mode: The Modern Wildlife Workflow
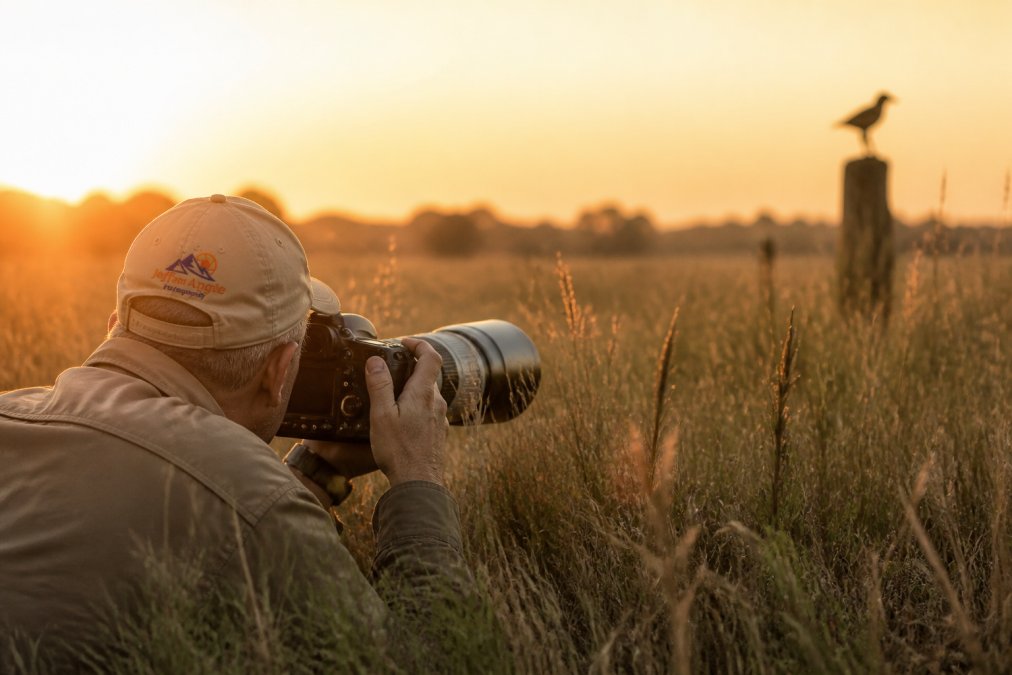
Auto ISO in manual mode lets you set aperture and shutter speed while the camera picks ISO, the biggest reason manual shooting is now practical for wildlife.
Setting Your Auto ISO Floor and Ceiling
Set a floor so the camera doesn’t drop ISO unnecessarily, and a ceiling so it doesn’t climb into ugly noise, a floor of 100 and a tested ceiling is common. Find your sensor’s noise limit before the trip, not during it.
Exposure Compensation When Auto ISO Misses
Auto ISO reads the scene and guesses, sometimes wrong. A bright sky behind a dark bird fools it into underexposing your subject.
On most mirrorless bodies, you can assign exposure compensation to a rear dial and adjust it with your thumb while your eye stays on the viewfinder. It becomes muscle memory within a morning.
Shutter Speed for Birds in Flight and Fast Action
Shutter speed for birds in flight usually needs to be 1/2000s or faster. Small, erratic birds demand the most; large, gliding birds let you slow down. Panning smooths the background and keeps the subject sharp, though it takes practice. Burst mode helps: fire a short burst as the bird crosses your frame, then pick the sharpest later.
Focusing Techniques for Moving Subjects
Autofocus is the one variable manual exposure doesn’t touch, so it deserves its own workflow. Exposure and focus are separate jobs, and the best shooters keep them on separate controls. Continuous autofocus (Canon’s AI Servo or Servo AF, Nikon and Sony’s AF-C) is the default for anything that moves; single-shot AF is for a perched bird you’ll fire on once.
Then pick a focus area:
- Single point, a bird against a clean sky, or an eye you can place the point on.
- Small zone / expanded point, an animal in brush, where you want the camera to hold the nearest subject but still respect your framing.
- Wide / tracking zone, erratic subjects like swallows or running hares, where you cannot keep a point on the animal.
Back-Button Focus Integration
Back-button focus (BBF) moves autofocus off the shutter button onto a rear button, usually AF-ON on Canon and Nikon, or a reassigned AF-ON or AEL button on Sony and Fujifilm. Your thumb drives focus; your index finger only fires the shutter. When you’re already managing aperture, shutter speed, and ISO with your right hand, you don’t want the shutter button re-triggering focus on every half-press, BBF decouples the two so a half-press never hunts.
A common setup:
- AF-ON (or the reassigned rear button) = continuous AF while held.
- A second rear button = single-shot AF for a static subject.
- Shutter button = fire only, no AF.
If your camera supports AF-On + Eye AF on a rear button, assign Eye AF to a second button. You can hold AF-On for zone tracking, then tap the second button to snap to the eye when the bird turns toward you, all without leaving manual exposure.
Prefocus and Trap Focus
For a bird on a known perch, prefocus on the perch itself, then wait. When the bird lands, it’s already in focus, the oldest trick in wildlife photography, and it still works because it removes autofocus lag entirely. Some bodies also support trap focus (focus priority release), where the shutter fires only when something enters the focus plane; it’s fiddly and rarely worth the menu dive.
Stabilization and Focus Together
Optical stabilization (Canon IS, Nikon VR, Sony OSS, Tamron VC) reduces hand shake, helping you keep a focus point on a small subject. It does not freeze motion, that’s your shutter speed’s job. On a tripod, most manufacturers recommend Mode 2 (panning) or off.
When Autofocus Fails
Autofocus hunts when contrast is low, fog, backlit rim light, or an animal behind grass. Switch to manual focus, use focus peaking if available, and rely on the magnified view. It’s slower, but it’s the only reliable option when the camera can’t see an edge.
Handling Changing Light and Low-Light Troubleshooting
Light changes faster than you’d expect, a cloud passes and your settings are suddenly wrong. Manual mode with Auto ISO absorbs most of that shift. When light drops, raise ISO before you slow the shutter: a sharp, slightly noisy frame beats a clean blur.
Reading the Histogram in the Field
The histogram graphs your photo’s tones and is more honest than your screen. A spike against the right edge means highlight clipping, where bright areas lose all detail; a spike against the left means crushed shadows. Aim for a histogram mostly in the middle, with room on each side.
Mirrorless vs. DSLR Manual Shooting and Post-Processing
Manual mode isn’t the same job on a mirrorless body as on a DSLR. The viewfinder changes how you set exposure, how fast you react, and how much you trust the meter.
What the EVF Changes
A mirrorless electronic viewfinder shows a live preview of your exposure: turn the shutter dial and the image brightens or darkens in real time, so you can set exposure by eye before pressing the shutter, no chimping, no guessing. A DSLR optical viewfinder shows the scene, not the exposure; the brightness you perceive is your eye’s adaptation, not the sensor’s, so you rely on the meter scale and the histogram after the fact.
Exposure Preview Caveats
Exposure preview isn’t always your friend. In very dark scenes the EVF boosts gain to keep the image visible, so what looks correctly exposed may be two stops under. In bright scenes it may clip highlights you could actually recover.
A common pattern among mirrorless shooters:
- Enable exposure preview for normal light.
- Disable it (or set it to “settings effect off”) when shooting in near-darkness, so the EVF stays bright enough to compose and focus.
- Trust the histogram over the preview when the two disagree.
Low-Light Troubleshooting: ISO vs. Shutter Speed
When light fails, you have three levers and only one is free. Aperture is usually already wide open, shutter speed is dictated by the subject, and ISO is the variable you actually trade.
A workable decision order:
- Open the aperture to its widest usable setting. On most telephotos that is f/4 to f/6.3; some lenses sharpen noticeably one stop down, so test yours.
- Set the slowest shutter you can hand-hold or that the subject allows. A perched owl at 1/250s is fine. A flying owl needs 1/2000s.
- Raise ISO to make up the difference. Modern full-frame sensors produce usable files at ISO 6400 and often 12800 with noise reduction. Crop sensors typically top out a stop or two lower.
Do not judge noise at 100% zoom on the rear LCD. The screen is small and the preview is compressed. Noise that looks catastrophic in-camera often cleans up fine in a RAW converter. Check on a computer before you delete.
Post-Processing Implications of Manual Exposure
Manual exposure choices determine your RAW file’s latitude. Two habits matter:
- Expose to the right (ETTR) without clipping. Push highlights as close to the right edge of the histogram as you can without blowing them. Shadow detail recovers far better than highlight detail.
- Keep ISO as low as the shutter and aperture allow. Every stop of ISO you add is a stop of dynamic range you give up. A file shot at ISO 400 has more recoverable shadow detail than the same scene at ISO 6400.
A Note on Battery and Heat
Mirrorless bodies run the sensor continuously to feed the EVF, so they drain batteries faster than DSLRs and warm up during long bursts. Carry spares, and in cold weather keep them in an inside pocket. A DSLR will outlast a mirrorless body on a single battery in most field conditions, a real trade-off, not a knock.
When to Use Manual Mode vs. Aperture Priority
Aperture priority is faster when light is steady and your subject is calm. You pick the aperture, the camera handles shutter speed and ISO.
Here’s a quick way to decide:
| Situation | Best Mode | Why |
|---|---|---|
| Bird in flight, bright sky | Manual + Auto ISO | Locks shutter speed, ignores the sky |
| Animal in shade, steady light | Aperture priority | Fast, few adjustments needed |
| Mixed sun and cloud | Manual + Auto ISO | Auto ISO absorbs the shifts |
| Still subject, low light | Aperture priority | Lets you focus on framing |
| Fast action, changing light | Manual + Auto ISO | Keeps motion frozen as light moves |
Frequently Asked Questions
How do I balance shutter speed and aperture for moving animals?
Start with shutter speed, since motion blur is harder to fix than depth of field. For birds in flight, use 1/2000s or faster. For running mammals, 1/1000s is a solid baseline. Then set aperture for the subject isolation you want, typically f/4 to f/6.3 with telephoto lenses. Let Auto ISO absorb the exposure gap. If your histogram shows highlight clipping, stop down or raise shutter speed further. Practice this order until it becomes automatic in the field.
Is manual mode necessary for professional wildlife photography?
Not strictly necessary, but it gives you control that priority modes cannot match when light shifts fast. Aperture priority works well in stable conditions, but manual mode with Auto ISO handles dappled forest light, sunrise transitions, and sudden cloud cover without you fighting the camera’s meter. Most working wildlife photographers use manual mode as their default and switch to aperture priority only when conditions are predictable. The goal is consistent exposure across a burst, not technical purity.
What is the best ISO setting for wildlife photography?
There is no single best ISO. Use the lowest ISO that still lets you hit your target shutter speed and aperture. With modern sensors, ISO 3200 or 6400 is often usable after noise reduction in post. For static subjects in good light, ISO 400 to 800 keeps dynamic range high. The practical rule: set your shutter speed and aperture first, then let Auto ISO choose the value. Check your histogram rather than fearing a specific number.
How does Auto ISO change the game in manual mode?
Auto ISO turns manual mode into a three-priority system. You lock shutter speed and aperture, and the camera adjusts brightness in real time. This matters for wildlife because light changes faster than your hands can. Set a minimum shutter speed for your subject and a maximum ISO you can tolerate, then focus on composition and tracking. Exposure compensation becomes your fine-tuning tool when the meter reads a bright sky or dark underbrush incorrectly.