Table of Contents
- Why 2026 Is the Year to Start Wildlife Photography
- Wildlife Photography Tips for Beginners: What to Expect in a Workshop
- Wildlife Photography Workshop Gear List: What to Bring and What You Can Rent
- How to Choose a Photography Tour: Key Factors for Beginners
- Comparing Workshop Styles: Group Tours vs. Private Instruction
- What to Expect on a Wildlife Photography Workshop: Itinerary and Instruction
- Budget-Friendly Alternatives and DIY Options for Beginners
- Frequently Asked Questions
Last Updated: September 16, 2026
Why 2026 Is the Year to Start Wildlife Photography
Wildlife photography workshops for beginners in 2026 are more accessible than ever, with small-group instruction now standard across reputable wildlife photography workshops. If you have been waiting for a sign to move beyond automatic mode, this is it.
Most beginners stall because they buy a camera, watch a few videos, and spend a year photographing squirrels in poor light. What moves the needle is guided field time, with someone correcting your exposure and composition while the subject is still in front of you.
That is the gap this guide from Jeff and Angie Photography closes. We help photographers capture stunning images while fostering a deep appreciation for the natural world.
Three things changed recently. Autofocus tracking on mid-range camera bodies got dramatically better, making birds in flight achievable for newcomers. Workshop groups got smaller. And the U.S. Fish and Wildlife Service continues to report strong public interest in wildlife observation, which means more protected access points and more workshops competing for your booking.
The difference between a great workshop and an expensive nature walk comes down to a handful of factors most beginners never check.
Wildlife Photography Tips for Beginners: What to Expect in a Workshop
Wildlife photography tips for beginners usually focus on settings, but the real value of a workshop is learning to read animals before you touch the shutter. Expect the first hour to cover behavior, not buttons.
A typical morning covers:
- Shutter speed first. For most wildlife, 1/500s is your floor. Birds in flight need 1/1000s or faster.
- Aperture priority as your default. Let the camera handle shutter while you control depth of field, then switch to manual once you understand the tradeoff.
- ISO settings and noise. Modern sensors handle high ISO better than you expect. A slightly noisy sharp image beats a clean blurry one.
- Exposure compensation. Bright sky behind a dark animal fools your meter every time. Learn to dial in plus or minus.
- Autofocus tracking. Set your camera to continuous autofocus and learn which mode holds a moving subject.
What most guides miss is that wildlife behavior drives every technical decision. A heron standing still needs a different approach than a heron striking. Instructors who know the species tell you what is about to happen, which is when your best frames appear.
Set your camera to burst mode but resist holding the shutter down. Short bursts of three to five frames give you the peak moment without filling your card and burying the keeper in a folder of near-identical files.
Wildlife Photography Workshop Gear List: What to Bring and What You Can Rent
A wildlife photography workshop gear list does not need to be expensive. The three items that genuinely change your results are a telephoto lens, a sturdy tripod, and spare batteries.
Start with what you own. A 70-300mm lens on a crop-sensor body gives more reach than you think. Before buying, ask the provider what focal lengths the locations require: some put you close to animals, others demand 500mm and up.
| Gear Item | Buy If | Rent If | Notes |
|---|---|---|---|
| Telephoto lens (100-400mm) | You shoot monthly | You shoot a few times a year | Rental runs a fraction of purchase |
| Sturdy tripod | You shoot in low light often | Always, for your first workshop | Weight matters more than height |
| Camera body with fast autofocus | You are committed long term | Your body is over five years old | Rent to test before upgrading |
| Extra batteries and cards | Always | Never | Cheap insurance, no exceptions |
| Rain cover | You live somewhere wet | Destination is dry | Check the forecast first |
Renting is the smart beginner move. You get professional glass for the trip without committing thousands to a lens you may use twice.
Do not buy a heavy telephoto lens the week before your workshop. An unfamiliar 2-kilogram lens on an unfamiliar tripod produces worse images than the light kit you already know how to use. Rent, practice for a month, then decide.
How to Choose a Photography Tour: Key Factors for Beginners
Learning how to choose a photography tour comes down to five checks: group size, instructor ratio, itinerary detail, skill-level honesty, and what is included. Get these right and you avoid the most common beginner disappointment. Here is how to turn each into a question with a defensible answer.
Group size and instructor-to-student ratio. This is the single most important factor. A group of six with one instructor means real coaching; a group of twenty means watching a lecture outdoors. Ask directly how many participants per instructor, and whether that person stays with your group.
Skill level requirements. A good provider states plainly whether a workshop suits complete beginners or assumes manual mode fluency. If the listing says “all levels welcome” but the sample images are all birds in flight at 1/2000s, the instruction assumes more than the copy admits.
Itinerary and daily schedule. Look for specifics: wake-up times, time at each location, whether there is an image review session. Vague itineraries usually mean the leader is improvising. Count distinct shooting locations per day: more than three usually means more time in the vehicle than behind the camera.
What is included. Meals, transportation, park permits, and lodging vary widely. Ask before you book. Two tours at the same headline price can differ by hundreds of dollars once you add park entry, meals, and ground transport.
Post-processing and editing. Some workshops include a Lightroom workflow session, often where beginners improve most, since a raw file needs editing to reach its potential.
Red flags worth walking away from:
- No stated maximum group size anywhere on the booking page
- A cancellation policy that keeps your deposit regardless of weather
- Sample images with no shooting details (no focal length, no settings, no location)
- A single instructor listed for a group of fifteen or more
- No mention of what happens if wildlife does not appear
Comparing Workshop Styles: Group Tours vs. Private Instruction
Group tours and private instruction serve different goals. Group workshops build community and cost less per day. Private instruction moves faster and targets your specific weaknesses.
| Factor | Small-Group Workshop | Private Instruction |
|---|---|---|
| Group size | Typically 4-8 photographers | Just you, or you and a partner |
| Instruction style | Shared coaching, peer learning | Fully tailored to your skill gaps |
| Pace | Set by the group | Set by you |
| Best for | Beginners wanting structure and support | Intermediate shooters fixing specific habits |
| Feedback | Group image review | One-on-one coaching throughout |
Beginners who want structure, peer support, and a guided itinerary without feeling lost. Small-group workshops deliver the most learning per dollar for a first experience.
What to Expect on a Wildlife Photography Workshop: Itinerary and Instruction
A typical wildlife photography workshop day starts before sunrise, breaks midday, and runs again through golden hour, because light and animal activity follow the same rhythm.
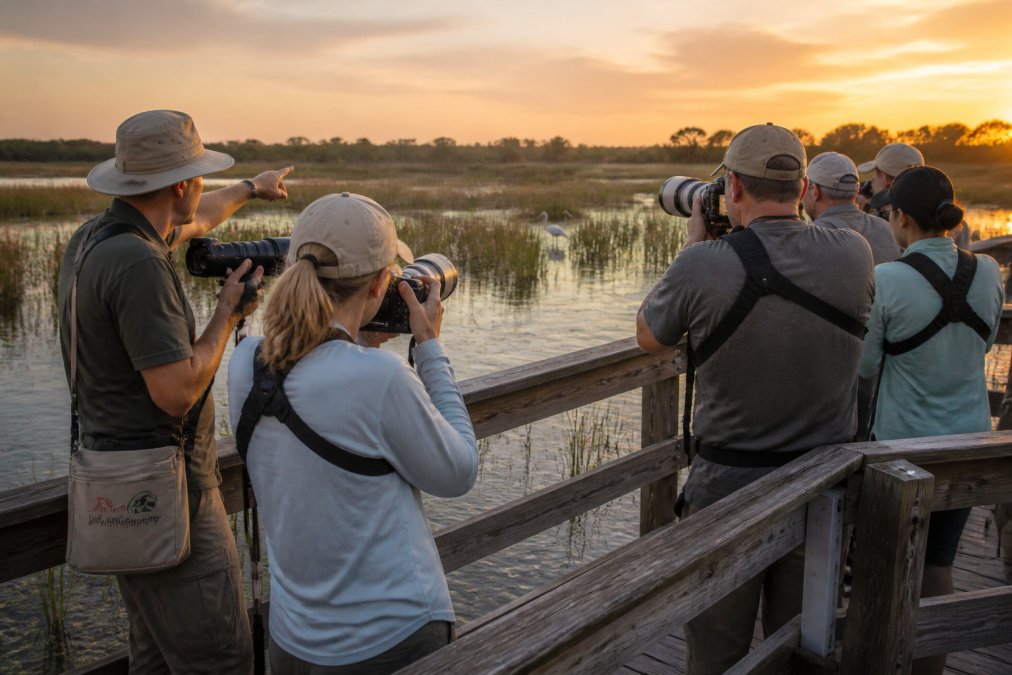
Here is what a realistic day looks like:
- Pre-dawn (about 90 minutes before sunrise). Meet, review the plan, check conditions. You are in position before the light arrives.
- Sunrise session (2-3 hours). Peak activity. This is when most keepers happen. Your instructor works the group, checking settings and framing.
- Midday break. Meals, card backup, battery charging, and often an image review session on a laptop.
- Afternoon session. Location change, different species or habitat. Often the time for technique drills.
- Golden hour (last 90 minutes of light). Warm light, active animals, the second-best window of the day.
- Evening debrief. Select images, discuss what worked, plan tomorrow.
Budget-Friendly Alternatives and DIY Options for Beginners
You do not need a formal workshop to start, but you do need a plan. Budget-friendly alternatives work if you supply the discipline a paid instructor would otherwise provide. Here is how to build skill before you are ready to pay for a guided trip.
- Pick one species or one behavior to study for the week (for example, a heron’s hunting stance).
- Arrive 30 minutes before the light is good and watch without shooting.
- Shoot one technique only, such as continuous autofocus on a moving subject.
- Review the same evening and write down the single most common failure.
- Fix that one failure on the next visit.
First-time attendee checklist:
- Confirm group size and instructor ratio in writing
- Ask exactly what is included and what is not
- Verify the skill level the workshop assumes
- Check physical demands and terrain
- Practice manual mode for two weeks before you go
- Format and label your memory cards in advance
- Bring more batteries than you think you need
- Back up every card at the end of each day
- Pack layers for pre-dawn cold and midday heat in the same day
- Bring a lens cloth and a way to keep rain off the front element
Frequently Asked Questions
What gear do I need for a beginner wildlife photography workshop?
You need a camera with manual controls, a telephoto lens (at least 200mm), extra batteries, memory cards, and a tripod. Many workshops provide loaner gear or have rental options. A wildlife photography workshop gear list often includes a rain cover, comfortable clothing, and a backpack. Don’t worry about having professional-grade equipment; beginner workshops cater to all levels.
Are wildlife photography workshops worth the investment for beginners?
Yes, they offer hands-on instruction, access to prime locations, and small group settings that accelerate learning. You’ll get personalized feedback on composition, exposure, and fieldcraft. While costs vary, the experience and mentorship can enhance your skills.
How do I choose between group workshops and private photography instruction?
Group workshops are social and cost-effective, with set itineraries and peer learning. Private instruction offers customized pacing and one-on-one coaching, ideal if you have specific goals or limited time. Assess your learning style, budget, and schedule.
What should I look for in a 2026 wildlife photography tour?
Look for small group sizes, experienced instructors, a clear itinerary, and ethical wildlife practices. Check if meals, transportation, and permits are included. Read reviews and ask about instructor-to-student ratios. The best tours prioritize fieldcraft, light, and behavior, not just ticking off species. Ensure the tour aligns with your skill level and interests.