Table of Contents
- Why Small Group Instruction Changes How You Learn Wildlife Photography
- Personalized Coaching: How Small Group Instruction Accelerates Skill Growth
- Photography Travel Workshops: Access, Ethics, and Field Guidance
- How Wildlife Photography Workshop Duration Affects Your Learning
- Best Practices for Wildlife Photography: What You Practice in a Small Group
- The Psychological and Social Benefits of Learning in a Small Group
- Is Small Group Wildlife Photography Instruction Worth It?
- Frequently Asked Questions
Last Updated: September 11, 2026
Why Small Group Instruction Changes How You Learn Wildlife Photography
Small group wildlife photography instruction benefits photographers because it replaces passive observation with active, repeated practice under a mentor’s eye. In a group of four to eight people, an instructor can see what your hands are doing, not just what your final image looks like. That distinction matters more than most people realize.
At Jeff and Angie Photography, we run workshops in Texas, Yellowstone, Alaska, British Columbia, and Costa Rica with exactly this structure in mind. The format is simple: fewer people, more attention per person, and instruction that adapts to the skill level in front of us.
Here’s the throughline for this whole article: the size of your group determines how much you actually learn, not how much you’re told.
The 20-60-20 Rule: How Attention Gets Divided in Photography Workshops
Most group workshops split attention in a predictable way. Roughly 20 percent of the time goes to logistics and travel, 60 percent to shooting on your own, and 20 percent to instruction that reaches everyone at once.
That 20 percent is where the problem lives. In a group of twenty, a single question eats the whole session. In a group of six, the same question is answered, demonstrated, and practiced three times over. The ratio doesn’t change. The depth does.
Personalized Coaching: How Small Group Instruction Accelerates Skill Growth
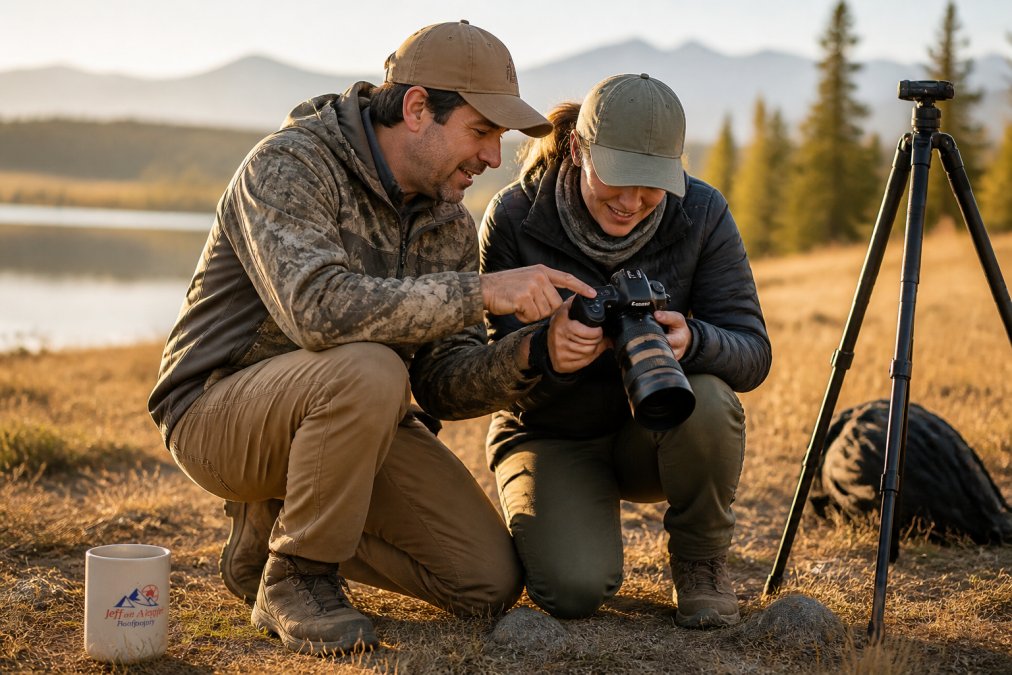
Personalized coaching is the single biggest advantage of a small group. An instructor who can watch you shoot, correct your stance, and adjust your settings in real time can help you make months of progress in just a few days.
A common mistake is assuming that more shooting time equals more progress. It doesn’t. Deliberate repetition with feedback does. That’s the difference between taking a thousand photos and taking a hundred better ones.
Hands-On Help With Camera Settings, From ISO to Shutter Speed
Manual mode stops being intimidating when someone stands next to you and walks through it. In a small group, we can set your ISO for the light, dial in aperture for depth of field, and adjust shutter speed for motion, then have you repeat the process until it sticks.
Beginners often arrive worried they’ll be lost. They aren’t, because the instruction starts where they are.
Image Critique and Portfolio Development in the Field
Image critique happens on the back of your camera, not weeks later in a forum. Reviewing shots on location lets you correct a composition and reshoot the same subject before the light changes. That immediate loop is what builds a portfolio worth showing.
Photography Travel Workshops: Access, Ethics, and Field Guidance
Photography travel workshops earn their value through access and guidance, not just location. A skilled guide reads wildlife behavior, positions the group for the best light, and knows when to back away.
Field guidance also covers the parts nobody photographs: location scouting, animal tracking, and reading lighting conditions before they shift. The U.S. Fish and Wildlife Service guidance on observing wildlife responsibly is a useful starting point for understanding why distance and patience matter.
How Wildlife Photography Workshop Duration Affects Your Learning
The length of a wildlife photography workshop should match the skill you’re trying to build, not the vacation time you have available. A single-day session works for camera settings and composition basics. Multi-day trips are better for behavior, patience, and storytelling. The mistake most photographers make is booking the longest trip they can afford instead of the shortest trip that targets their actual gap.
|
Duration |
Best For |
What You’ll Practice |
Typical Daily Rhythm |
|---|---|---|---|
|
Single day |
Beginners, camera basics |
ISO, aperture, shutter speed |
One dawn or dusk session, classroom debrief |
|
2-3 days |
Composition and light |
Field etiquette, tracking, light reading |
Two shooting windows per day, midday critique |
|
4-7 days |
Portfolio and storytelling |
Behavior, patience, sequencing, post-processing |
Dawn and dusk shoots, midday editing and review |
|
8+ days |
Multi-species or multi-location bodies of work |
Trip planning, backup workflow, long-form narrative |
Travel days folded into shooting days |
Longer isn’t automatically better. A focused weekend beats a poorly structured week every time. The variable that actually predicts improvement is how many feedback loops you complete, not how many sunrises you sit through.
The Hidden Costs of DIY Trips vs. Guided Workshops
This calculation is the math most articles skip. A DIY wildlife trip looks cheaper on the receipt, but the real cost includes items that never appear in a workshop fee:
- Permits and access fees. Many federal and state wildlife areas require permits, timed entries, or lottery draws. The U.S. Fish and Wildlife Service refuge permit information and individual state wildlife agency pages list the time spent researching them, which can be significant time that adds up.
- Transport and fuel. Remote locations often mean long drives on gravel roads, plus a rental vehicle that can handle them.
- Local guides and scouts. Hiring a local guide for a single morning can rival a full day of a small-group workshop.
- Lost shooting days. Weather, closures, and wrong-season timing can wipe out a DIY trip with no fallback plan. A guided group usually has contingency locations.
- Gear mistakes. Buying the wrong lens or filter before a trip is a sunk cost a mentor would have prevented in one conversation.
A guided small-group workshop bundles scouting, permits, transport logistics, and instruction into one fee. Whether that’s worth it depends on how you value your research and recovery time, but the comparison is never “workshop fee vs. free.”
Matching Duration to Your Fitness and Mobility
Duration also has to match your body, not just your goals. Wildlife photography is often physically demanding in ways trip listings understate: long lenses, tripods, and blinds mean carrying weight over uneven ground, sometimes before sunrise.
A few questions worth asking before you book:
- How far is the typical walk from vehicle to shooting position, and over what terrain?
- Are there seated or vehicle-based options for participants with limited mobility?
- What is the elevation, and how does the itinerary handle altitude?
- Are there restrooms, shade, or shelter at the shooting locations?
- Can the group split if one participant needs a slower pace?
Small groups make these accommodations easier because the instructor isn’t managing twenty people across a quarter mile. If you have knee, back, or stamina concerns, a shorter, vehicle-based workshop will teach you more than a rugged multi-day trek you spend recovering from.
What a Realistic Day Looks Like
A typical small-group day runs roughly like this: pre-dawn meet and briefing, a two-to-three-hour shooting window during the best light, a midday break for meals and image review, an afternoon scouting or editing session, and a second shooting window through dusk. That rhythm matters because it front-loads instruction when you’re fresh and reserves the harshest light for learning instead of shooting.
If a workshop’s itinerary is all shooting and no review, you’re paying for access, not instruction. If it’s all classroom and no field time, you’re paying for a lecture. The small-group format is what allows an instructor to hold both halves together.
Best Practices for Wildlife Photography: What You Practice in a Small Group
Best practices for wildlife photography are easier to absorb when you practice them with feedback. Composition techniques, tripod stability, and telephoto lens handling all improve faster when someone corrects you mid-shot.
Ethical Photography, Field Etiquette, and Habitat Preservation
Ethical photography means putting the animal’s welfare ahead of the image. Field etiquette covers staying on trails, keeping distance, and never baiting wildlife for a shot. Habitat preservation is a long-term commitment: the places we love remain photographable only if we treat them well.
The Psychological and Social Benefits of Learning in a Small Group
Most wildlife photography content treats the group as a logistics container, a way to split costs and fill a van. The psychological side gets ignored, and it’s arguably the bigger reason small-group instruction works.
Why Large Groups Suppress Learning
In a group of twenty, every question carries a social cost. You weigh whether it’s worth the instructor’s attention, whether the person next to you already knows the answer, and whether you’ll look like the beginner. Most people stay quiet. The result is a room full of photographers who all have the same three questions, and none of them ask.
In a group of four to eight, the calculus shifts. The instructor is close enough to notice you’re stuck before you have to announce it. Questions become conversation. The person next to you is usually wrestling with the same problem, which normalizes it.
A common pattern instructors see: the participant who barely speaks on day one is the one asking the sharpest technical questions by day three. That shift isn’t about personality; it’s about the group size that removes the cost of asking.
Confidence, Risk-Taking, and the Permission to Fail
Skill growth in photography requires experimentation, and experimentation requires permission to produce poor images. Large, competitive groups punish that. Small groups reward it.
This phenomenon shows up in a few ways:
- Willingness to leave auto mode. Beginners in small groups switch to manual earlier because someone is there to catch their mistakes.
- There is a willingness for a new composition. When critique is immediate and low-stakes, you reshoot instead of settling.
- Willingness to admit confusion. The fastest way to learn a menu system or a focus mode is to say you don’t understand it. Small groups make that safe.
- Reduced comparison anxiety. With five peers instead of twenty, you’re less likely to measure your work against someone with a decade of experience.
Collaborative Post-Processing and Critique Sessions
This is the part most wildlife photography guides skip entirely: what happens after the card comes out of the camera. In a small group, post-processing becomes a shared activity rather than a solitary struggle.
A typical evening session looks like this: everyone imports their best frames, the instructor walks through one or two edits on a large screen, and then participants work on their images while the instructor rotates between them. The value isn’t just the instructor’s edits; it’s watching how five other photographers approached the same scene. You see compositions you missed, exposure choices you wouldn’t have made, and crops that reframe a shot you’d already written off.
Group critique also builds a vocabulary. Learning to articulate why an image works, the light, the gesture, and the negative space makes you a better self-editor when you’re alone in the field. That skill outlasts the workshop.
Networking That Actually Lasts
Networking with fellow photographers is a quiet bonus, but it’s worth being specific about what it produces. The people you meet on a small trip often become the ones you shoot with for years, the person who texts you when a rare species shows up nearby, the one who splits a rental car on the next trip, and the one whose critique you trust because you watched them learn alongside you.
Large groups produce acquaintances. Small groups produce collaborators. If you’re building a long-term practice in wildlife photography, the second is worth more than the itinerary.
When a Small Group Isn’t the Right Fit
Honesty matters here. Small-group instruction isn’t universally better. If you’re already advanced and want solitude, a private guide or solo trip may serve you better. If your goal is purely social and you don’t care about technical growth, a larger tour is fine. The small-group advantage is concentrated in one thing: how much personalized feedback reaches you per day. If you don’t want feedback, you’re paying for something you won’t use.
Is Small Group Wildlife Photography Instruction Worth It?
Instruction in small group wildlife photography is worth it when you want measurable improvement rather than a scenic vacation with a camera. The cost-benefit math favors guided learning if your goal is skill and favors DIY if your goal is simply being outdoors.
DIY trips cost less up front, but you absorb the full learning curve alone: location scouting, animal tracking, and lighting decisions with no one to check your work. Guided small-group trips trade money for time saved and skills gained faster.
If you want a middle path, a private photography class or a monthly mentorship keeps the personal attention without the travel commitment. Our [photography workshops (/product-tag/photography-workshop/) and mentorship programs | jeffandangiephotography.com] combine both.
Frequently Asked Questions
How does group size affect the quality of photography instruction?
Smaller groups mean more one-on-one time with your instructor. In a group of four to six, you can get real-time feedback on composition techniques, camera settings, and field etiquette instead of waiting in line for a quick glance. This hands-on instruction is especially valuable when lighting conditions shift fast or wildlife behavior changes suddenly. Ask about the maximum group size before booking any photography travel workshop.
Is a small group photography tour better for beginners?
Yes, beginners often benefit most. A small group lets instructors start with the basics of ISO settings, aperture, and shutter speed without slowing down advanced participants. You also get help reading wildlife behavior and setting up a tripod for stability. If you are new to manual mode, look for a workshop that caps group size and offers personalized coaching throughout the trip.
How long should a wildlife photography workshop duration be for real skill improvement?
Most multi-day workshops run three to seven days, which gives enough time to practice in different lighting conditions and locations. A single-day event can teach camera settings, but longer durations let you build technical proficiency, receive image critique, and develop a portfolio. For beginners, a four- or five-day workshop often hits the sweet spot between cost and learning.
What should I look for in a small group wildlife photography workshop?
Check the maximum group size, instructor experience, and whether the workshop includes in-the-field coaching versus just location scouting. Ask about the itinerary, physical accessibility, and what camera gear is provided. A good workshop also covers ethical photography and habitat preservation. Request sample images from past participants to confirm the instruction delivers portfolio-worthy results.